
Article

A Guide to Pairing Lipstick with Eye Makeup
Choosing the perfect lipstick and eye makeup combination can elevate your look and highlight your unique features. Whether you’re headed to a casual brunch or a glamorous evening event, the right pairing can make a world of difference. In this guide, we’ll walk you through the essential tips and tricks for creating harmonious looks that accentuate your natural beauty.
Understanding the Color Wheel
Before diving into specific pairings, let’s explore how the color wheel can guide your choices. Understanding complementary and analogous color schemes will help you create a balanced look.
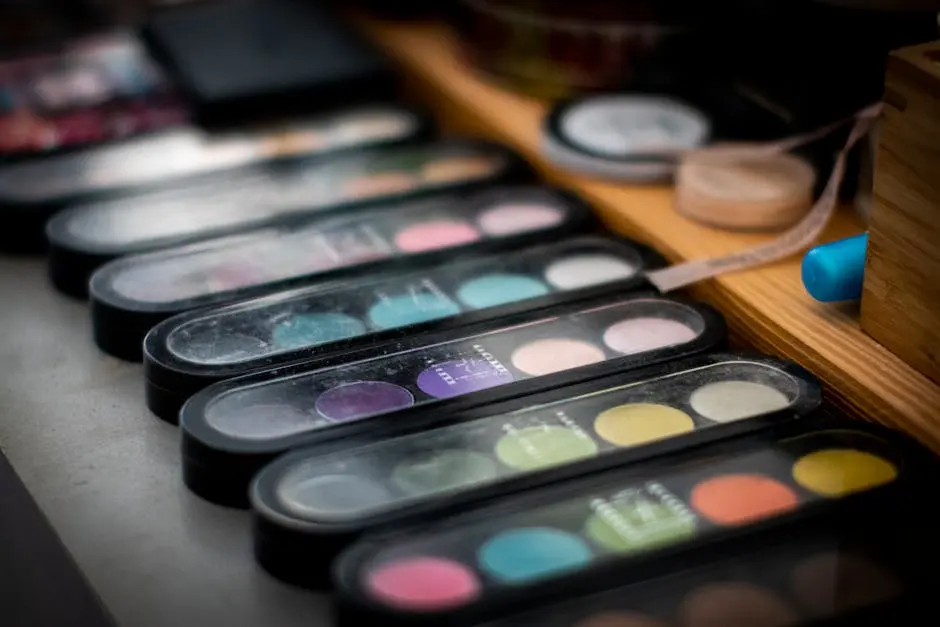
When you pair colors that complement each other, you can make a dramatic statement; think bright orange lipstick against a teal blue eye shadow. This type of contrast can draw attention and elevate your overall look. Conversely, colors that are analogous, such as softer pinks and peaches, can give a more subtle and elegant appearance. This balance not only reflects knowledge of color theory but also serves as a foundation for building your makeup skills.
As you experiment with different hues, always keep in mind the mood you want to convey. A deep red lipstick combined with warm golden shades can create a sultry vibe, perfect for an evening out. Alternatively, a light peach lip paired with soft lavender tones can exude freshness and youthfulness, ideal for daytime outings. The color wheel isn’t just about aesthetics; it’s a tool for your beauty arsenal.
Matching Lipstick to Eye Shadow
Learn how to choose lipstick shades that either complement or contrast with your eye shadow, enhancing your overall appearance. A matching scheme can be a delightful way to create a polished, cohesive look. For example, using a dusky rose lipstick with taupe and soft pink eyes can yield an ethereal quality, making your features appear soft yet defined.
On the other hand, you might want to try contrasting colors to make a bold statement. A rich burgundy lip paired with icy blue eye makeup doesn’t just bring drama; it draws the eye in, encouraging onlookers to appreciate your unique style. Balancing how these colors interact is key—if one is bold, make the other more muted, and vice versa.
One common pitfall is to overlook the intensity of your eye shadow. High-impact eyes can easily overpower a soft lip, so consider the entire equation. A smoky eye calls for a toned-down lip, whereas vibrant eye colors usually harmonize beautifully with deeper lip shades. Ultimately, work with what feels most comfortable while you’re creating a stunning combination.
Choosing the Right Finish
Exploring different finishes—matte, glossy, satin—can transform your look. Imagine how the mood of your makeup entirely shifts with a simple choice of finish. A matte lipstick can convey sophistication and elegance, while a glossy finish often adds a youthful exuberance. It’s fascinating how such subtleties can shape the overall perception of your makeup.
When you pair a satin-finish lipstick with shimmering eye shadows, you’re opening a doorway to a versatile appearance that’s suitable for both day and night. In contrast, a deep matte lipstick… let’s say a classic plum—when paired with an iridescent eye shadow, can bring out unexpected depth and complexity, giving your makeup a modern flair.
The season you’re in can also influence your choice of finish. Summer tends to favor glosses that catch the light, making your lips look fuller and more inviting under the sun. Winter might be a prime time to embrace velvet matte lipsticks, which not only flatter but also provide comfort during colder months. Thus, experimenting with finishes can be both delightful and practical, guiding you through the ever-changing makeup landscape.
Seasonal Shades and Trends
Makeup trends change with the seasons. Each year brings new colors to the forefront, and understanding these shifts can keep your makeup game fresh and relevant. This year, for instance, earthy tones are making a big comeback; think deep greens and browns that mirror the changing foliage in autumn.
In spring, soft pastels can breathe new life into your look, encouraging a romantic and ethereal vibe. Pairing a delicate pastel pink lip with mint green eye makeup can take you effortlessly from brunch to evening outings. Understanding how seasonal trends align with your personal style can empower you to take risks—just remember to have fun with it!
However, while trends are exciting, they shouldn’t dictate your choices entirely. Stick to colors that resonate with you personally. Some individuals may feel more empowered in deep berry shades during winter, while others thrive in bright pinks. It’s about what makes you feel confident and radiant!
Skin Tone Considerations
Understanding your skin tone is crucial in selecting the right makeup. This section discusses how to choose lipstick and eye shadow shades that flatter your complexion. Whether you have warm, cool, or neutral undertones, there are countless options that can highlight your beauty.
For warm undertones, think earthy colors like terracotta or coral that bring out the warmth in your complexion. Conversely, cool undertones shine with shades like berry or mauve. If you’re fortunate enough to have a neutral skin tone, you have the unique advantage of rocking various shades—whether they are soft pinks or deep reds.
Recognizing your undertone can break down the intimidating wall of choices when it comes to lipstick. Spend some time swatching different shades against your skin; it’s often a revelation. Understanding this aspect truly empowers you and aids in building a versatile makeup kit that can easily see you through any occasion.
Making it Work for Different Occasions
Discover how to adapt your lipstick and eye makeup pairing for various events, from casual outings to formal gatherings. For a casual lunch with friends, keep things simple—a soft nude lipstick paired with a light wash of gold on the eyelids can look effortlessly chic.
For date night or social events, you might want to amp it up a notch. Consider a striking red lip with defined cat eyes—this combination radiates confidence and allure without being over the top. On the flip side, when heading to a business meeting, opting for a subtle lip color combined with muted eye shades can exude professionalism and composure.
Remember that the key to a successful makeup look is finding balance according to the occasion. Play with colors and finishes, but keep in mind the context of where you’ll be and who you’ll be with. Dressing up is not just about the clothes; your makeup should reflect the vibe you want to convey as well.
Expert Tips from Makeup Artists
Learn some insider tips from professional makeup artists on how to master the art of pairing lipstick and eye makeup. One universal tip is to work with a color palette that you can easily mix and match. This flexibility can save you time and ensure that you always look polished and put together.
Another gem from the pros is the magic of blending. Don’t hesitate to combine two shades of lipstick for a unique hue that’s just right for you. Layering can create depth and character; just remember to balance with your eye makeup. The idea is to create synergy, where your lip and eye looks elevate each other instead of competing.
Finally, professional makeup artists always emphasize the importance of skin prep. Well-hydrated skin sets the perfect canvas for makeup application. A moisturized lip and eye area make your colors pop and last longer. Don’t skimp on these foundational steps, as they transform your look from ordinary to extraordinary.
Final Thoughts on Makeup Pairing
With these tips in mind, you’re now equipped to confidently explore the world of makeup combinations and to express your creativity through your lipstick and eye makeup choices. Remember that makeup is an art, and the best part is experimenting to find what makes you feel fabulous.

How Do I Clean My Makeup Powder Brush Effectively?
Cleaning your makeup powder brush is essential for maintaining both your hygiene and the quality of your makeup application. An unclean brush can harbor bacteria, which can lead to skin irritations, and can also affect how well your makeup goes on. In this guide, we’ll walk you through the simple steps to effectively clean your makeup powder brush, ensuring it stays in great condition for every use.
Gather Your Supplies
Before you start, make sure you have gentle soap, warm water, and a clean towel ready. These supplies will help you effectively clean your brush without causing any damage.
You may also want to consider using a brush cleaning mat, which can provide a textured surface to help you work the soap through the bristles more effectively. This can save you time and ensure a thorough cleanse.
Additionally, if your brush is particularly dirty, it might be worthwhile to use a specialized brush cleaner. These products are designed to break down makeup residues and can offer a deeper clean than regular soap.
Having everything ready before you begin will make the process smoother and more enjoyable. It helps set the stage for a successful brush cleaning session.
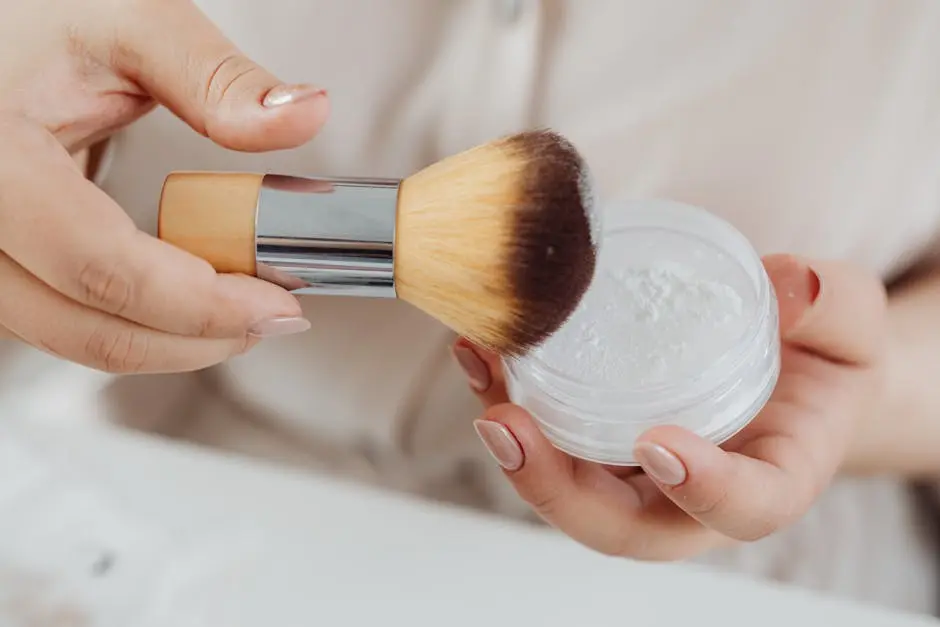
Wet the Bristles
Start by rinsing the bristles under lukewarm running water. Make sure not to submerge the entire brush, as this can loosen the glue holding the bristles in place.
It’s important to hold the brush with the bristles facing down. This technique helps prevent water from seeping into the handle, which can damage the bristles over time. Rinsing is a crucial first step in the cleaning process.
Take your time here, allowing the bristles to soak up the water a bit. This prepares them for the soap, making the cleaning more effective and easier.
Apply Soap and Clean
Apply a small amount of gentle soap directly to the bristles. Use your fingers to gently work the soap into the bristles, creating a lather that will help lift makeup and dirt.
Be sure to clean all sides of the bristles by making circular motions with your fingers. This technique ensures that every contour of the brush is thoroughly cleaned.
If you notice that there’s built-up product or stubborn residue, don’t hesitate to apply a little extra soap. This will help break down the makeup and leave the brush spotless.
Rinse and Shape the Brush
Once the brush is clean, rinse the bristles thoroughly under running water until all soap is removed. Gently reshape the brush head and lay it flat on a towel to dry.
Make sure to rinse until the water runs clear; any remaining soap can dry out the bristles and cause them to become stiff or scratchy. This final rinsing step can’t be overlooked.
While laying the brush flat, avoid propping it up so the bristles stay in their proper shape and air can circulate, helping them dry without damage.
Final Thoughts on Cleaning Your Makeup Powder Brush
By following these steps, you can ensure your makeup powder brush remains clean and functional, enhancing your makeup application experience. Regular cleansing is the key to maintaining the lifespan of your brushes and keeping your skin healthy.

10 Best Practices for Maintaining Your Makeup Brushes with a Cleaner
Maintaining clean makeup brushes is essential for both your skin health and your makeup application. Not only does it ensure a flawless finish, but it also extends the life of your brushes. In this guide, we’ll explore ten best practices for keeping your makeup brushes in pristine condition using a reliable makeup brush cleaner. Let’s keep those brushes looking and performing their best!
1. Choose the Right Brush Cleaner
Selecting a suitable makeup brush cleaner is the first step in your cleaning regimen. Consider options like gentle soap, alcohol-free cleansers, or dedicated brush cleaning solutions that will effectively remove makeup without damaging the bristles.
It’s essential to know that different types of brushes may require different cleaning products. For instance, synthetic brushes can generally handle more robust cleaners without fear of damage, while natural hair brushes might benefit from gentler solutions. Reading labels and perhaps doing a patch test can help you find the perfect fit for your brushes.
2. Clean Your Brushes Regularly
Regular cleaning is crucial. Aim to wash your brushes at least once a week to prevent product buildup and bacterial growth. Frequent cleaning can also help maintain brush performance. Think of it this way: just as we wash our clothes and dishes to keep them fresh, we need to extend the same courtesy to our makeup tools.
Additionally, if you notice your brushes collecting dust or appearing discolored, it’s a good indication that they need a cleanup sooner rather than later. Trust me, your face will thank you when you apply makeup with clean tools, providing a smoother and more even application.
3. Use Lukewarm Water
When rinsing your brushes, use lukewarm water. Hot water can damage the glue that holds the bristles, while cold water may not effectively remove makeup residue. Lukewarm water strikes the perfect balance. This small step can significantly prolong the life of your brushes, ensuring they remain effective for the longest time possible.
Moreover, if you’re working with delicate bristles, the choice of water temperature can make a world of difference. Lukewarm water is gentle and effective, helping to coax out dirt and makeup without compromising the integrity of the bristles themselves.
4. Gently Swirl and Rinse
To clean your brushes, gently swirl them in the brush cleaner and lukewarm water. Rinsing in a downward direction ensures that water doesn’t get inside the ferrule, preserving the brush’s structure. This technique minimizes the chance of bristle shedding and keeps your brushes in pristine working condition.
When swirling, keep in mind that too much agitation can lead to damage. Being gentle is key; think of it more like a dance than a scrubbing battle—let the brush cleaner do the work while you ensure your brushes remain well cared for.
5. Avoid Using Too Much Pressure
When cleaning, apply gentle pressure to avoid damaging the bristles. Overly aggressive scrubbing can lead to fraying and a loss of shape, which can affect application. Instead of using force, allow the brush cleaner to do its job; you might be surprised at how easily makeup residue lifts away without the need for harsh scrubbing.
Furthermore, using excessive pressure can cause the bristles to bend abnormally, which not only disturbs their shape but can also lead to uneven application when applying your makeup later. You want to maintain that perfect shape the brush was designed to have, after all!
6. Reshape and Dry Flat
After cleaning, reshape the brush bristles to their original form. Always lay them flat on a towel to dry, avoiding upright drying which can cause water to seep into the ferrule. This might sound simple, but proper drying techniques can vastly impact your brush’s performance and lifespan.
Additionally, try to position your brushes in a way that promotes airflow around them, speeding up the drying process. You’ll find that a little attention to how you dry your brushes can lead to substantial differences in their longevity and functionality.
7. Create a Cleaning Schedule
Establishing a regular cleaning schedule can help streamline your beauty routine. Consider cleaning your brushes on a specific day of the week or after an event where you used heavy makeup. By making this a part of your self-care practice, you’ll not only be taking care of your tools but also nurturing your skin.
Using a calendar app or simple reminder notes can be incredibly helpful. Whether you choose to clean them on a Sunday evening or perhaps after a big night out, whatever day you choose, make it a habit. Consistency is essential, and soon it will become second nature.
8. Sanitize with Rubbing Alcohol
For extra sanitation, especially for brushes used on breakouts or blemishes, spritzing them with rubbing alcohol can help kill bacteria. Just ensure to follow with a thorough rinse. This extra step can be particularly beneficial for those brushes that come into contact with liquid or cream products, which can harbor bacteria.
Think of it like giving your brushes a little spa treatment. Rubbing alcohol acts as a disinfectant, ensuring that no harmful bacteria find their way back onto your skin. Remember, healthy brushes create a healthy makeup routine!
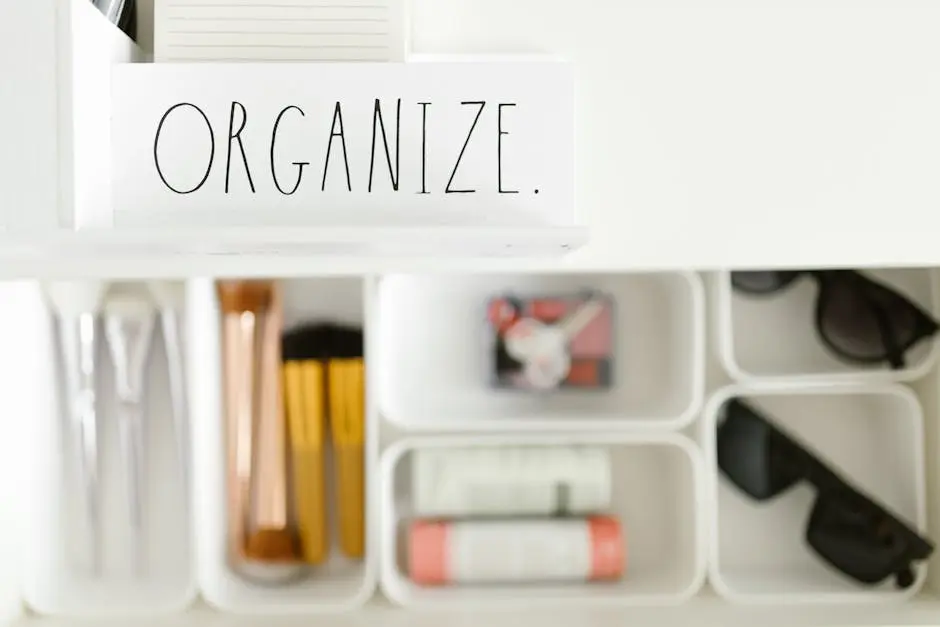
9. Store Your Brushes Properly
Proper storage is essential to keep your brushes from getting damaged. Use a brush holder or roll that keeps them separated and upright, limiting bristle distortion. Ideally, you want to keep your brushes in a clean environment, away from dust and potential contaminants.
To add a unique touch to your storage, consider creatively repurposing items you already own, like vintage containers or small jars. Not only will this elevate your organizational system, but it can also serve as a stylish addition to your vanity.
10. Know When to Replace Brushes
Even with the best care, brushes have a lifespan. Be aware of signs that indicate a replacement is due, such as shedding bristles, uneven shapes, or a lack of performance during application. It can be difficult to say goodbye to your favorite tools, but recognizing when it’s time to let go is crucial for your beauty routine.
Investing in quality brushes in the first place can also ease the pain of replacements. Good brushes often come with warranties or guarantees, which can provide peace of mind as you navigate replacements down the line. Remember, better brushes can offer better results, and that’s always worth considering!

10 Tips for Caring for Your Makeup Brushes to Extend Their Lifespan
Makeup brushes are essential tools in our beauty routine, but they often don’t get the TLC they deserve. Proper care can not only extend the lifespan of your favorite brushes but also ensure that your makeup application is flawless. Here are ten simple tips to keep your brushes clean, soft, and effective, allowing your makeup skills to shine.
1. Regular Cleaning Is Key
Make it a habit to wash your brushes regularly to remove bacteria, residue, and grime. A simple wash every week can make a world of difference. Think of your brushes as extensions of your artistry; just as you would clean your palette or tools, your brushes deserve the same attention.
The buildup of makeup can lead to dull application and skin issues. When you skip cleaning, you’re effectively applying makeup over leftover product, which can lead to uneven finishes. In essence, regular cleaning not only maintains the integrity of your brushes but also ensures your skin stays healthy.
2. Choose the Right Cleanser
Using the right product is crucial. Opt for gentle cleansers or brush-specific shampoos that won’t damage your brushes. Harsh soaps can strip the natural oils from the bristles and cause fibers to fray.
Choosing a pH-balanced cleanser ensures that your brushes will not only get clean but remain soft and effective for applying makeup. There are many options on the market, from natural oils to specialty brush cleansers, so take your time to find one that aligns with your values and needs.
3. Avoid Hot Water
When washing your brushes, always use lukewarm water. Hot water can loosen the glue that holds the bristles together. This is an important point; the integrity of your brush is at stake with every wash.
Imagine the disappointment of frayed bristles or brushes that lose their shape after a couple of washes. By opting for lukewarm water, you’re giving your brushes the best chance for longevity while ensuring they clean effectively without risking damage.
4. Let Them Dry Naturally
After cleaning, lay your brushes flat on a clean towel to dry. Avoid standing them upright, as this can cause water to seep into the ferrule. Letting them dry naturally ensures that no moisture remains trapped, which could lead to mold or mildew.
Consider creating a designated drying space where you can lay them out comfortably. This not only promotes airflow but also protects the bristles from bending or fraying, ensuring your tools maintain their ideal shape and performance for future uses.
5. Store Brushes Properly
Store your brushes in a cool, dry place, and away from direct sunlight. Consider using a brush holder or roll for easy access. Proper storage is as important as cleaning; how you keep your brushes can significantly impact their longevity.
Avoid tossing them into a drawer where they can get tangled and misshaped. Instead, take the time to store them upright in a container or roll that protects the heads and keeps them from collecting dust. After all, keeping your workspace organized means your brushes will be ready for action whenever you need them.
6. Mind Your Frequency of Use
The more you use a brush, the more often it needs to be cleaned. For daily users, cleaning twice a week is ideal. If you find yourself using different brushes for different makeup looks, prioritize cleaning after intense use to keep bacteria at bay.
Keeping a schedule for your brush cleaning can streamline your beauty routine. You might even pair it with another activity, like watching a favorite show or listening to a podcast, turning a chore into a mini self-care moment.
7. Keep Them Away From Bacteria
Store your brushes covered to prevent dust and bacteria buildup, particularly in humid environments. This is particularly important if you live in a region with a lot of moisture, as humidity can encourage rapid bacterial growth.
When in doubt, a protective case can serve as both a storage solution and a means of prolonging the life of your brushes. Keeping them in a protective cover minimizes exposure and keeps them clean, ensuring they’re ready for your next makeup adventure.
8. Be Gentle When Cleaning
Always clean your brushes with care. Avoid scrubbing too hard, as this can damage the bristles. Instead, use a soft motion to ensure the bristles are cleaned without being harmed.
Gentle cleaning not only preserves the shape and quality of your brushes but also allows them to do their job better. After all, the purpose of cleaning is to enhance performance, so treating your brushes with patience will yield the best results.
9. Invest in Quality Brushes
Good quality brushes may cost more initially, but they last longer and provide a better makeup application. Think of quality brushes as an investment in your beauty routine. While less expensive brushes might tempt you, their longevity often does not measure up to the benefits of a well-made product.
When you enjoy quality tools, your makeup application becomes easier and more enjoyable. Soft bristles glide effortlessly over skin, blending and applying products seamlessly. In the long run, investing in quality can save you money as you won’t need to replace cheaper brushes frequently.
10. Replace When Necessary
No matter how well you care for your brushes, they won’t last forever. Keep an eye out for signs of wear and replace them when needed. Frayed bristles, loss of shape, or a change in texture can all signal it’s time for a new brush.
By proactively replacing worn brushes, you maintain a higher standard in your makeup application and skincare routine. Tools that are in peak condition help you achieve flawless looks, allowing your makeup skills to shine through.

The Importance of a Clean Brush and the Perfect Cleaner
When it comes to makeup application, the tools you use are just as important as the products themselves. A clean brush is essential for achieving flawless results, but do you know why it’s so important? In this blog, we’ll explore the significance of maintaining your brushes and the benefits of using the right cleaner. Let’s unlock the secret to radiant makeup with a simple yet effective routine!
Why Clean Brushes Matter
Dirty brushes can harbor bacteria, leading to skin issues such as breakouts and irritation. Clean brushes not only help in achieving smooth application but also benefit your skin’s health.
You might think, ‘It’s just a brush,’ but each time you apply makeup, you’re transferring oils, dirt, and other impurities. If those brushes aren’t cleaned regularly, they can influence your skin negatively, causing unwanted blemishes. In addition, dirty brushes can disrupt the color of your makeup products, leading to uneven application and a less than radiant look. A clean brush is your ally in the quest for that flawless finish.
Moreover, using clean brushes can extend the life of the brush itself. The build-up of makeup and residue can damage the bristles over time. Regularly cleaning your tools not only helps keep your skin clear but also preserves the integrity of the brush fibers. This is particularly crucial for high-quality brushes that you’ve invested in—why risk ruining them by neglecting proper care?
The Right Time to Clean Your Brushes
Establish a routine for cleaning your brushes. Whether weekly or bi-weekly, knowing when to clean ensures that your tools remain in top condition for the best results.
Think of it like brushing your teeth. You wouldn’t skip that routine, would you? Incorporate brush cleaning into your self-care regimen. If you’re a makeup enthusiast who applies product daily, it may be beneficial to clean your brushes weekly. But even if you don’t wear makeup often, a thorough cleaning every couple of weeks can work wonders.
It’s also wise to clean your brushes after they have been exposed to high use, such as during events or vacations. After all, your skin deserves the best care possible. If you notice any sensitivity or if your makeup isn’t applying as evenly as it used to, it might be a sign that it’s time to clean those brushes!
Choosing the Perfect Makeup Brush Cleaner
Not all cleaners are made equal! Discover what to look for in a great brush cleaner — from ingredients to effectiveness — to ensure you’re using the best product for your brushes.
When searching for a makeup brush cleaner, consider ingredients that will effectively break down the product buildup without being harsh on the bristles. Natural options, like coconut oil or gentle soap, are often effective and add nourishment. On the other hand, some commercial products are designed for convenience and speed, providing instant drying and sanitizing effects. Make sure to read labels and choose what suits your needs best.
Remember to test any new cleaner on a small section of your brush to avoid damaging your favorite tools. The right cleaner not only removes grime but also ensures your brushes maintain their shape and overall quality over time. A good cleaner can revitalize old brushes that may feel stiff or rough to the touch, making them feel brand new again.
DIY vs. Store-Bought Cleaners
Explore the pros and cons of DIY brush cleaners compared to commercial options. Learn about simple recipes you can make at home, as well as the convenience of store-bought solutions.
DIY cleaners can be an excellent choice if you prefer natural products, as you can customize the ingredients based on your skin’s sensitivities. A simple mixture of olive oil and dish soap can break down stubborn grime effectively. However, crafting your cleaning solution may not appeal to everyone, especially when time is of the essence.
Store-bought cleaners are convenient and often formulated to target specific make-up residues without damaging your brushes. They can save time; just spray, clean, and go! Nonetheless, finding a product that balances ease of use with gentle yet effective ingredients may require some trial and error. Ultimately, the decision between DIY and store-bought options depends on your personal preferences and lifestyle.
How to Properly Clean Your Brushes
Cleaning techniques vary by brush type. This section provides a step-by-step guide on how to effectively clean all your different brushes to maximize their lifespan.
Start with the larger brushes, such as foundation brushes. Wet the bristles under lukewarm water, making sure not to soak the ferrule, as this can loosen the glue. Apply your soap or cleaner directly to the bristles and gently work it through with your fingers. Rinse thoroughly until the water runs clear and reshape the bristles while damp.
For smaller brushes, like eyeshadow or lip brushes, follow the same protocol. Use less product to avoid wastage. Remember to clean your sponge applicators in the same manner; they can harbor bacteria if neglected! A well-cleaned brush will hold its shape for much longer, enhancing your makeup game in ways you might not even realize.
Maintaining Clean Brushes for Long-Term Use
Proper care extends beyond cleaning. Here, we discuss storage options and practices to maintain bristle integrity, ensuring your brushes last for years to come.
Storing your brushes correctly is just as important as cleaning them. Rather than throwing them into a drawer, consider using a brush holder that keeps the bristles upright. This prevents them from getting squashed and losing their shape. When traveling, wrap them in a clean cloth to protect against dust and damage.
It’s also good practice to keep track of your brushes’ health. Regularly inspect them for shedding hairs or damaged bristles. A well-maintained brush not only serves you better, but it also boosts your confidence as you glide them over your face, knowing you’re applying your makeup with the best tools available.
Embrace Cleanliness for a Beautiful You
In conclusion, maintaining clean brushes is not just a cosmetic beau ideal; it’s a necessary step towards healthy skin and better makeup application. By investing in a quality cleaner and integrating brush care into your routine, you’re investing in your beauty journey. So, let’s keep those bristles clean and our makeup flawless!

12 Tips for Choosing the Perfect Professional Makeup Brushes
Choosing the right makeup brushes is essential for achieving a flawless look. With so many options available, it can be overwhelming to find the perfect tools for your makeup application. In this post, we’ll dive into practical tips to help you navigate your options and select the perfect professional makeup brushes that suit your needs.
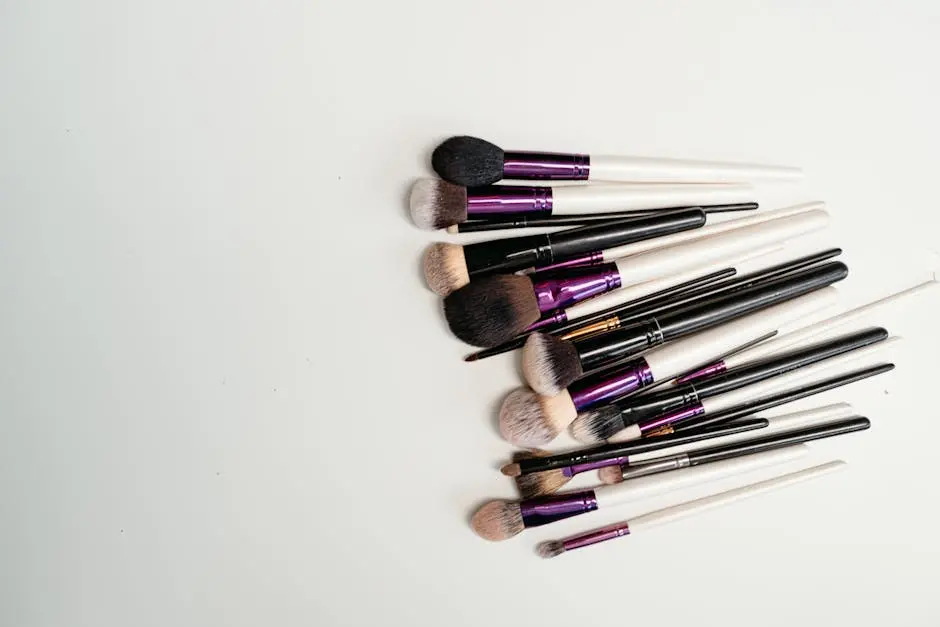
1. Understanding Different Brush Types
Explore the various types of makeup brushes, their specific uses, and how they can elevate your makeup game. From foundation brushes to eyeliner tools, understanding these distinctions will greatly enhance your makeup application. For instance, a flat foundation brush is perfect for distributing product evenly on the skin, while a fluffy blending brush is essential for achieving that seamless eyeshadow transition. Knowing which brush to use and when can truly transform your look, making it appear more polished and professional.
Additionally, there are specialized brushes that serve unique purposes, such as fan brushes for highlighter or contour brushes for precise cheekbone definition. Get familiar with these tools—it makes all the difference! Remember, the right brush type is just as critical as the products you’re using. It may take time to familiarize yourself with them, but this knowledge will pay off when you see the difference in your makeup finish.
2. Choosing the Right Brush Material
Discover the difference between synthetic and natural bristles to determine which is best for your makeup application. Synthetic brushes are often more versatile, allowing for better application with cream and liquid products. They are also more durable and easier to clean, which can be a huge advantage for daily use. On the other hand, natural brushes tend to blend powders beautifully and offer a soft touch on the skin.
It’s worth noting that some users might have sensitivities to certain materials, making it important to pay attention to the bristle type. When choosing between the two, consider your makeup habits, the types of products you frequently use, and your skin’s sensitivity. Setting aside some time to experiment with both options might lead you to discover the perfect match for you.
3. Paying Attention to Brush Size
Learn how brush size can influence your makeup outcome, from detailed work to broader applications. Larger brushes can cover more ground and speed up your routine, making them ideal for foundation or powder. However, don’t underestimate the power of a small detail brush. These are essential for tasks like applying precise eyeliner or blending in the corners of your eyes.
When selecting brush sizes, think about the looks you usually create. For instance, if you’re always aiming for a bold eye, a range of brush sizes will allow you to master that style effortlessly. Remember, having a few sizes in your toolkit opens up endless possibilities for creativity!
4. Checking for Quality Construction
Understand the importance of good quality construction in brushes and what to look for when purchasing. Investing in high-quality brushes means they’ll last longer and perform better, which ultimately saves you money in the long run. Check if the bristles are securely glued to the ferrule and the handle is sturdy. A well-constructed brush will feel balanced and comfortable in your hand when applying makeup.
A telltale sign of quality is the feel of the bristles—soft yet firm enough to provide control. Don’t shy away from testing brushes in-store, if possible. By ensuring that you choose brushes that are not only visually appealing but also durable, you are paving the way for a smoother makeup application experience.
5. Choosing the Right Shape for Your Needs
Explore the various brush shapes available and how each one serves a different purpose in makeup application. For instance, rounded brushes work wonders for buffing foundation into the skin, whereas angled brushes are excellent for contouring. Additionally, flat brushes can create sharp lines and fill in brows beautifully.
Each shape is a tool designed to achieve specific effects, so think about your personal makeup style when selecting your brushes. A rounded tapering brush might become your new best friend for achieving that effortlessly blended look. Not to mention, having a range of shapes in your collection allows you to tackle any makeup challenge with confidence!
6. Considering Your Skin Type
Tailor your brush choices based on your skin type for optimal application and comfort. For instance, those with sensitive skin might prefer softer brushes made from natural fibers to reduce irritation. Meanwhile, oily or combination skin types might find that synthetic brushes work better as they don’t absorb excess product.
Understanding your skin’s needs can guide you in selecting brushes that feel great while applying makeup. Plus, with the right brushes, you’ll notice how much smoother your application becomes. Don’t hesitate to take your time evaluating how different brushes interact with your skin!
7. Exploring Versatile Multi-Purpose Brushes
Find out which brushes can serve multiple functions and save you space and money in your kit. For example, a dual-ended brush can work wonders for contouring or blending, all while occupying the space of just one brush. Multi-purpose brushes are ideal for makeup junkies who want to simplify their routine without compromising on quality or versatility.
When scouting for versatile brushes, consider choosing those that can transition between different products. A simple eyeshadow brush that can also apply highlighter can make your makeup bag much lighter! The key is to find brushes that suit various styles and products so that you’ll always have the right tool at hand.
8. Reading Reviews and Recommendations
Discover the value of checking reviews to find out which brushes work best for users like you. Whether it’s blogs, social media platforms, or makeup forums, gathering insights from fellow makeup lovers can guide your decisions. Reviews often highlight the strengths and weaknesses of particular brushes, providing you with an idea of what to expect.
Don’t shy away from the experiences of others—often their recommendations can lead you to brushes that you might not have considered initially. As you delve into various reviews, you’ll find that some brushes repeatedly receive glowing praise for their performance and quality. This can help narrow down your choices effectively.
9. Setting a Budget for Your Brushes
Learn how to establish a budget that allows you to invest in quality brushes without breaking the bank. It’s easy to be tempted by high-end brands, but you can also find fantastic brushes at a variety of price points. Set a realistic budget that allows you to build your collection gradually— it is essential to find a balance between quality and affordability.
Consider investing in a few key brushes first before expanding your collection. This way, you’ll ensure you’re obtaining quality tools while still keeping your finances in check. Plus, many brands run sales and promotions, so remaining open to shopping during those events can result in excellent finds!
10. Taking Care of Your Brushes
Master the art of brush care for longevity and optimal performance, ensuring your investment pays off. Cleaning your brushes regularly not only maintains hygiene but also enhances their performance. Using mild soap or a dedicated brush cleaner will allow you to keep bristles soft and product-free, thereby retaining their shape.
In addition, make sure to store your brushes properly. Avoid tossing them into a drawer together, as this can cause them to lose their shape. Instead, invest in a brush holder or keep them upright in a cup. By taking the time to care for your tools, you’ll enjoy better results and your brushes will last longer!
11. Experimenting with Different Brands
Don’t hesitate to explore different brands to find the brushes that feel right for you and your makeup style. Some brands focus on specific techniques or materials, offering unique options that can enhance your application. Trying out various brands allows you to discover which ones resonate with you and suit your needs best.
Many beauty enthusiasts swear by their favorite brands, and exploring these names might lead you to your new go-tos. From high-end luxury options to affordable drugstore finds, there’s a wide world of brushes waiting for you. The most important thing is to pick brushes that feel good in your hand and deliver the results you’re after!
12. Building a Customized Brush Set
Create a personalized brush collection tailored to your specific makeup needs and preferences. Start by identifying the types of makeup looks you most often create and the essential brushes needed for those looks. Creating a list can help streamline your purchasing process, ensuring that no vital brush is overlooked.
Over time, as you develop your skills and experiment with new techniques, add brushes to your kit that fit the new styles you want to learn. Your personalized brush set should grow as you do, making your makeup journey exciting and full of possibilities. With a collection that speaks to your personal aesthetic and needs, you’ll be empowered to create flawless looks day after day.

How Do I Choose the Right Magnetic Palette for My Makeup Collection?
Choosing the right magnetic palette can make a huge difference in organizing and showcasing your makeup collection. With so many options available, it can feel overwhelming. In this guide, we’ll break down the essential factors to help you pick the perfect palette for your needs.
Determine Your Needs
Identify what types of products you’ll be storing, such as eyeshadows, powders, or blushes, and how many of each you have.
Understanding your needs is the first step toward the perfect palette. For instance, if you have a large collection of eyeshadows, a palette with plenty of space and organizing options is essential. Alternatively, if you’re more of a minimalist, focus on a compact design that holds only your favorites.
Be sure to consider any seasonal products or limited editions in your collection as well. Does your current makeup routine include shades that are meant for summer festivals or winter festivities? A palette that can adapt to your changing needs will serve you better in the long run.
Consider Size and Portability
Think about how much space you have and whether you’ll be traveling with your palette. This will help you decide on a size that works best for you.
If you’re often on the go, a slim and lightweight magnetic palette will become your best friend. Imagine having a beautifully organized collection that you can easily toss into your bag! Just be sure it has enough room for all your must-have shades.
Conversely, if your makeup application usually happens at home, you might prefer a larger palette. This allows you to have options without the constraint of a small size. Just keep in mind, larger palettes might be less convenient to store, especially if you have limited space.
Evaluate Material Quality
Check the materials used in the palette’s construction to ensure durability and ease of cleaning, which can help protect your makeup.
A quality magnetic palette should be sturdy enough to withstand everyday use. Look for options made from solid materials like metal or reinforced plastic. This not only ensures longevity but also protects your precious makeup from potential damage.
Don’t overlook the importance of ease of cleaning. As much as you love your makeup, it can get messy! Finding a palette with a smooth, wipeable surface can save you time and effort, letting you focus more on creating beautiful looks.
Look for Versatile Features
Choose palettes with customizable compartments or magnetic sheets that allow you to tailor the layout to your collection.
Versatility is key when it comes to your palette. Look for ones that feature interchangeable panels or sections that can be adjusted to fit your makeup needs. This way, you can easily mix and match products or even rearrange based on your mood or the occasion!
Some palettes even come with additional features, like built-in mirrors or brush holders. A palette that can do more than just store your makeup can enhance your experience and make you feel even more inspired while getting ready.
Match Your Aesthetic
Find a palette that resonates with your personal style. Whether sleek and modern or fun and colorful, the look should inspire you to use it!
Your magnetic palette is not just a tool; it’s a part of your beauty journey. Choose one that visually represents you and brings you joy every time you see it. From chic black finishes to bright, bold patterns, the options are endless — so why not have fun with it?
Moreover, a well-designed palette can enhance your makeup application experience. If you’re excited to use it because it looks good, you’re more likely to enjoy your routine and experiment with different looks. Let your personality shine through not just in your makeup but also in the tools you choose!
Final Thoughts
By considering factors like size, material, and functionality, you can find a magnetic palette that not only meets your makeup organization needs but also fits your style. Take your time to choose wisely, and you’ll enjoy a more streamlined, beautiful makeup collection!

How Do Vegan Eyeliner Brushes Compare to Natural Hair Options?
Are you torn between choosing vegan eyeliner brushes and those made from natural hair? In this blog, we’ll break down the differences, benefits, and drawbacks of each to help you make an informed decision for your beauty routine.
Understanding Vegan Eyeliner Brushes
Vegan eyeliner brushes are made from synthetic materials, often designed to mimic the properties of natural hair. They are cruelty-free and often more affordable.
One of the most appealing features of vegan brushes is their versatility. Whether you’re going for a bold wing or a soft smudge, these brushes can achieve various looks with ease.
Additionally, many vegan brushes are crafted to be durable and long-lasting. This means they can withstand regular use without fraying or losing their shape.
For those concerned about animal welfare, vegan eyeliner brushes provide peace of mind. They’re a great option for anyone looking to support cruelty-free practices in their beauty routines.
Exploring Natural Hair Brushes
Natural hair brushes are crafted from animal fur, providing a unique softness and ability to hold pigment. However, they come with ethical considerations and can be more expensive.
The allure of natural hair brushes lies in their luxurious feel and superior application capabilities. These brushes can blend products seamlessly, making them a favorite among professional makeup artists.
Moreover, natural hair tends to pick up and distribute product more effectively, allowing for a stunning finish that many users swear by. If you’re after a flawless look, natural brushes might be worth considering.
However, with advancements in the cosmetic industry, some vegan brushes are catching up in terms of performance and texture. It’s essential to try different brands to find the right fit for your preferences.
Performance: Vegan vs. Natural
In terms of performance, vegan brushes can deliver excellent results with the right materials. However, some users prefer the texture and blendability of natural hair brushes for specific applications.
For instance, if you love dramatic eyeliner looks, a vegan brush specifically designed for precision can often do the job just as well as a natural hair brush. The key lies in selecting high-quality vegan options.
However, some enthusiasts still favor the feel of natural hair against their skin, often claiming it provides a more ‘professional’ touch. It can also make a difference for makeup artists who want the best of what both worlds offer.
Thus, the debate between vegan and natural brushes is ongoing, with passionate advocates on both sides. It’s an exciting time to experiment and discover what works best for your makeup application.
Benefits of Vegan Eyeliner Brushes
Vegan brushes are typically hypoallergenic, making them suitable for sensitive skin. They are also easier to clean and maintain over time.
Another considerable advantage is that vegan brushes often dry faster after washing. This helps you get back to your beauty routine quicker, without much hassle.
Many users also report that vegan options are less prone to shedding compared to natural hair counterparts, ensuring that you get the longevity you pay for.
Moreover, they can often be produced with eco-friendly materials, contributing to a more sustainable beauty routine. By choosing vegan, you’re not just opting for a product, but also making a statement about your values.
Considering the Environmental Impact
Choosing vegan brushes can help reduce the demand for animal products, contributing to a more sustainable beauty industry. It’s worth considering the environmental footprint of your beauty tools.
Manufacturing synthetic brushes often has a lower impact on our planet compared to animal farming. Therefore, your choice can make a subtle but significant difference.
Additionally, many vegan brands are becoming increasingly focused on sustainability in all areas of production, from sourcing materials to packaging. This aligns with a growing trend in consumer awareness and responsibility.
Becoming informed about the choices we make in beauty can help inspire others to join the movement toward more sustainable practices. Every little action contributes to a healthier planet.
Making the Right Choice for You
Ultimately, the choice between vegan and natural hair eyeliner brushes comes down to personal preference and values. Consider trying both to see which aligns better with your beauty goals.
Don’t hesitate to mix and match! Many makeup lovers find that combining both types of brushes in their kit allows for the best application across various techniques.
Before making a purchase, take the time to read reviews and watch tutorials to understand how each type of brush performs in real-world situations. This can help you feel confident in your selection.
Ultimately, your beauty routine should reflect who you are and your beliefs. Whichever option you choose, make sure it makes you feel happy and aligned with your values.
Final Thoughts
In conclusion, both vegan eyeliner brushes and natural hair options have their unique advantages and considerations. Your choice ultimately depends on your values, skin sensitivity, and desired results. Happy brushing!

9 Reasons Why Every Makeup Artist Needs a Versatile Magnetic Palette
As a makeup artist, having the right tools can make all the difference. One essential item that should be in every artist’s kit is a versatile magnetic palette. Not only is it practical, but it’s also a game-changer for creativity and organization. Let’s dive into the top reasons why this tool deserves a prime spot in your makeup arsenal.
1. Enhances Customization for Every Look
Moreover, the ability to swap in new products means you can curate your palette to suit specific occasions—weddings, fashion shows, or simple photoshoots, the possibilities are endless. Just think, one palette for day and night looks. You can experiment with bold colors for an avant-garde photoshoot, then swiftly transition to understated shades for a bride’s makeup. The versatility offered by a magnetic palette isn’t just a convenience—it’s an absolute necessity for any artist looking to push creative boundaries.
2. Streamlines Your Makeup Kit
By reducing clutter, magnetic palettes not only save you space but also time—time that can be better spent with your clients. Plus, when everything is neatly arranged in one place, it not only speeds up your application process but also enhances the professionalism of your setup. You become a maestro, orchestrating beauty with your well-organized tools, and clients take notice of your meticulousness and dedication.
3. Easily Replaceable and Refillable
Think of it as an artist’s canvas that adapts as your style evolves. You can curate your selections based on seasonal trends or personal preference, making your palette truly your own. And let’s be honest: there’s a satisfying joy in managing your palette, watching it change and grow with your artistry. Not only is it a cost-effective approach, but it also promotes sustainable practices, which is increasingly important in our world today.
4. Perfect for Traveling Makeup Artists
Additionally, it minimizes the likelihood of breakage, which is always a risk when transporting fragile beauty products. The reliability of knowing your shades will arrive intact allows you to focus solely on your artistry, rather than worrying about the state of your supplies. With a magnetic palette, you become a mobile beauty studio, ready to create magic wherever you are.
5. Versatile for Various Makeup Types
As someone who dips into various makeup types, you can handpick your favorites and create a portfolio of shades and textures. From creamy to powder formulations, every artist can curate a palette that works for their specific needs and techniques. This is not just for eyes; it’s about creating a holistic approach to makeup artistry. With a magnetic palette, you don’t have to carry several separate compacts—you can fit all your essentials into one sleek unit!
6. Encourages Creativity and Experimentation
Creativity thrives in environments where artists feel free to explore. When you have a versatile magnetic palette in front of you, there’s no right or wrong way to layer colors. Every new combination is a chance to discover something extraordinary. This spirit of experimentation doesn’t just enhance your portfolio; it keeps your passion for makeup alive, allowing you to continually evolve your personal style and adapt to ever-changing trends.
7. Saves Space and Reduces Clutter
This streamlined organization means you can be more efficient. Not only do you free up space for other essentials, but you also create a clean and professional appearance in your kit. Eliminating the clutter gives you a clear mind to focus more on creativity and your clients, ultimately making the makeup application process smoother and more enjoyable for everyone involved.
8. Allows for Easy Clean-Up
Think about how much easier your post-appointment routine becomes. Wipe down your palette, reinsert the pans, and you’re ready to go! This efficiency not only saves time but also helps maintain a professional appearance. Clients will appreciate the tidiness of your workspace, reinforcing their trust in your skills as an artist.
9. Adapts to Client Preferences
Moreover, being able to adjust products meant for fairer skin tones versus deeper complexions encourages inclusivity in your artistry. You’re not just applying makeup; you’re creating a personalized experience that speaks volumes about your professional integrity. In today’s diverse market, this level of customization is not just a plus; it’s essential.

10 Lipstick Tips to Complement Your Makeup Brush Arsenal
Complex makeup may seem intimidating, but with the right lipstick tips, you can elevate your beauty game effortlessly. Here, we explore ten essential tips that seamlessly integrate with your makeup brush arsenal, ensuring that every application is flawless and radiant. Whether you’re a makeup novice or a seasoned expert, these tips are your ticket to perfect lips.
1. Choosing the Right Lipstick Formulation
Learn which lipstick formulation—matte, gloss, or creamy—is best suited for your lips and the look you’re aiming for.
When it comes to lipstick, formulation can make all the difference. Matte lipsticks offer a bold, long-lasting finish but can be drying. On the other hand, glossy formulas provide a luscious shine and moisturizing benefits. Creamy lipsticks sit right in the middle, delivering hydration while still providing a bit of color payoff. Understanding your skin type, the occasion, and even the weather can help you decide which formulation is right for any given day.
Feeling overwhelmed by choices? Start by swatching various formulations on your arm or hand. Remember, the qualities of each lipstick will differ based on your individual skin tone and lip texture. Take your time and enjoy the process of finding your perfect match!
2. Prepping Your Lips for Application
Discover the importance of exfoliation and hydration in creating a smooth canvas for your lipstick.
Preparation is essential if you want your lipstick to look its best. Start by gently exfoliating your lips once or twice a week to remove dead skin cells. You can use a lip scrub or even a soft toothbrush to achieve this. The smoother your lips, the better your lipstick will sit upon them. And don’t forget hydration! Applying a generous layer of lip balm or gloss can lock in moisture, producing a soft, plump surface that enhances the overall impact of your lipstick.
As you apply your balm, consider making it part of your daily routine, especially in colder months when lips are more prone to drying out. A little TLC goes a long way in ensuring your lips are always ready for that perfect application!
3. The Power of Lip Liner
Understand how using a lip liner can define your lips while helping your lipstick last longer.
Lip liner might seem like an extra step, but it’s truly a game changer. Not only does it help to define the shape of your lips, but it also acts as a barrier that prevents your lipstick from feathering or bleeding. When you choose a lip liner that matches your natural lip color or the shade of your lipstick, it will create the illusion of fuller lips while ensuring that your lip color stays exactly where you want it.
To apply, start at your cupid’s bow and work your way down to the corners. Use short strokes for better precision. For an added trick, fill in your lips with the liner for extra staying power; this makes your lipstick last even longer, allowing you to enjoy that perfect pout throughout the day.
4. Blending Techniques with Brushes
Explore the best brushes to use for blending your lipstick, creating a seamless, professional finish.
While many people think that lipstick is best applied straight from the tube or with a traditional applicator, using a brush can elevate your look to professional levels. A lipstick brush allows for precision, enabling you to reach every corner of your lips and blend seamlessly. Look for a brush with a pointed tip to help create detailed lines and a flatter edge for filling in.
To achieve a flawless finish, take the time to layer and blend your lipstick. First, apply a small amount, then use the brush to blend it out. Dabbing your lips gently together can also help in blending the inner corners. This technique will soften the edges and give your lipstick a more natural and finished appearance. Plus, it can help you experiment with intensity—layering will allow you to achieve everything from a bold statement to a soft wash of color.
5. Using Highlighter for Dimension
Find out how highlighter can enhance the shape of your lips and make your lipstick pop!
Highlighter isn’t just for your cheekbones! When applied strategically to your lips, it can truly enhance their shape, giving the illusion of fullness. Start by applying a little highlighter to your cupid’s bow—the area above your upper lip—this draws attention and creates dimension. You can also add a tiny dot to the center of your lower lip to make your lip color pop even more.
Choose a subtle shimmer that complements your lipstick without overpowering it. This will add a beautiful glow, transforming your lips into a focal point of your makeup look, allowing them to glow with health and beauty.
6. Setting Your Lips for Longevity
Learn techniques to set your lipstick in place to ensure all-day wear without fading or smudging.
After perfecting your lipstick look, the last thing you want is for it to fade or smudge as the day progresses. To set your lips, consider using a transparent setting powder. Lightly dust the powder over your lips using a fluffy brush; this will soak up any excess oils and help lock your color into place.
Alternatively, a setting spray specifically for lips can do wonders too. Hold it at a distance and mist your lips lightly. This creates an additional layer of protection that offers long-lasting wear, regardless of whether you’re sipping on coffee or enjoying a night out. Keeping your lipstick in check is essential for a polished look!
7. Mixing Shades for Custom Colors
Get creative by mixing different lipstick shades to personalize your look according to your style.
Don’t be afraid to experiment with different lipstick shades! Mixing colors can yield unique results that feel inspired and personal. For instance, combine a bold red with a soft nude to create a shade that’s custom to you, balancing brightness and subtlety. This creativity will not only set your look apart but also allow you to express your style effectively.
Using a clean lip brush, layer two shades together on your lips. Begin with the darker shade and add lighter touches to the center for a gradient effect, or blend to create entirely new hues. This technique opens up endless possibilities in your lipstick wardrobe—making it easy to transition from day to night or from one season to the next with a simple mix!
8. The Importance of Touch-Ups
Understand when and how to touch up your lipstick to maintain that fresh look throughout the day.
Maintaining a fresh lipstick look requires attention in the form of strategic touch-ups. After a meal or a coffee break, your lipstick might need a little love to stay intact. Always keep your go-to shade handy for quick touch-ups throughout the day, especially if you’re heading from work to a social gathering.
To touch up, first, gently blot your lips with a tissue to remove excess color or residue. Then, reapply your lipstick evenly starting from the center and working your way out to the edges. If time allows, a small application of lip gloss on top can add vibrancy and lock in your color for a fresh look. Remember, a well-maintained lip color speaks volumes about your overall makeup.
9. Removing Lipstick Effectively
Learn the best practices for removing lipstick without damaging your lips, ensuring they remain healthy.
At the end of the day, removing your lipstick properly is just as important as applying it. Using a gentle makeup remover specifically formulated for lips can ensure you clean off all traces without causing damage. Avoid harsh scrubbing; instead, apply the remover to a cotton pad and let it sit on your lips for a few seconds before wiping away gently.
Once your lips are clean, follow up with a moisturizing lip balm or a treatment to nourish and hydrate. This keeps your lips healthy and ready for the next day’s adventures. Establishing a routine for lipstick removal not only prevents chapped lips but also prolongs the health of your natural lip texture for years to come!
10. Finding Your Signature Lip Look
Discover how to experiment with different styles and colors to find the perfect signature lip color that suits you best.
Embracing your signature lip look is a delightful journey! Take the time to explore various shades—from deep burgundies to playful pinks—until you find what resonates with you. Consider factors such as your skin tone; warm tones often shine with coral and peach hues, while cool tones may align better with berry and plum shades.
Don’t hesitate to switch up textures and finishes from time to time! A bold matte in the colder months can shift to a playful gloss in the summer. Your signature lip can embody your personality and mood, so have fun experimenting. Each time you find a new shade or formula that you love, you’ll discover more about your unique style and expressiveness!